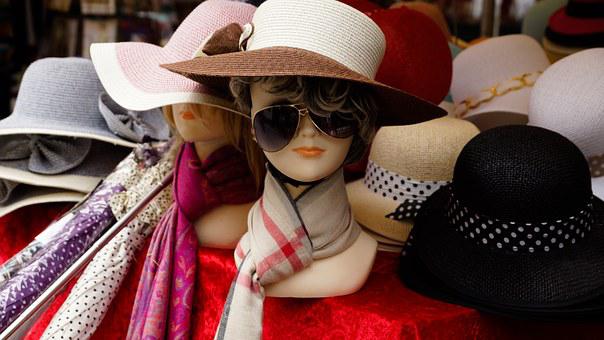
A scarf (une écharpe in French) is the ultimate French wardrobe staple. Indeed, French women are known for wearing scarves in all seasons. Scarves are not considered a winter item in France, but are worn all year, including during the summer. Only the hottest weather will prevent French women from wearing scarves.
A scarf is an excellent way to add French chic to any outfit. Indeed, it can function as both an accessory and a statement piece. It can be used to dress up anything casual, look good with denim, and look elegant with formal clothing. So, if you’re not sure how to tie a scarf correctly or how to avoid looking overly accessorized, here’s your guide to wearing a scarf the French way.
Put on a Scarf Like a Frenchwoman
Before I show you how to nouer (tie) your scarf like a true Frenchwoman, make sure you have the right scarf in your closet. Indeed, there are three types of scarves worn by French women in different seasons: une écharpe, un foulard, and une étole. The distinction between those scarves is found in the material, texture, thickness, size, and style.
To begin, an écharpe is typically made of heavy fabrics such as wool, cashmere, or cotton. It’s a must-have item in any French winter capsule wardrobe. It must be a long, narrow rectangle with a width ranging from 20cm to 60cm. The French typically match the color of their scarves to the color of their coats. They also always have as many scarves as coats. And I guarantee that a textured écharpe in the same color as your coat will add subtle visual interest to any outfit you wear. Above all, the écharpe is designed to keep you warm and can be worn in two ways.
A Step-by-Step Guide on Tying the French Knot
Look 1
This is the most traditional “french girl” scarf look. It’s so simple, and if you have a shorter scarf, you can skip the middle steps (wrapping it twice around your neck) and just roll it diagonally and tie it in a knot!
Step one: To begin, take a square-ish scarf and fold it in half diagonally to form a triangle. It can be a big square or a small square, but this is the scarf shape that works best for these tying methods. I’ve discovered that most vintage scarves I’ve found are larger, like the one I’m wearing here–but many of the ones sold new are more “bandana” size. (You can see my tutorial on how to tie a bandana here.) The method is the same regardless!
Step two: Roll from the long edge (hotdog style, if you will, remember that from grade school? Haha!) to the corner until it has formed a nice little “rope,” if you will.
Step three: Wrap the scarf once around your neck (as you would with a regular scarf!) Then you should have two loose ends.
Step four: Tie the ends together. (Depending on the material of your scarf, this may be sufficient, or you may need to knot it.) Finally, I like to move the knot to the side so it’s slightly off-center.
You’re finished!
Look 2
The good news is that this method is nearly identical to the one described above! Almost the same steps, but a completely different look!
Step one: Fold your square scarf diagonally in half.
Step two: The beginning of this step will vary depending on the size of the “triangle” part of your bandana. Step three is optional if you have an average-sized square scarf. Alternatively, if you have a larger scarf (or simply want your bandana to be smaller), you can roll the edge a little like we did before–start rolling the scarf from the longest edge toward the end. Unlike before, do not roll the scarf all the way to the corner–stop halfway through (where you stop will determine the size of the “bandana” portion). You should now have a long rectangular roll with a small triangle at the end.
Hold the triangular portion in front of your body (it should resemble a bandana type shape at this point, like a bandit, haha!) and wrap the ends around your neck once. (This time, it’s just a different shape than the previous motions!)
Step three: Tie the ends together, as we did in the first tutorial. You can leave them hanging after one tie, or tie them into a knot for added security. You can tie the ends OVER or UNDER the bandana, depending on your preference. Leave the loose ends hanging out, or tuck them underneath the triangular portion of the bandana for a cleaner look. There is no wrong way to do it–it just depends on what you want to achieve and how much of your scarf you want to show off!
I like to finish by twisting the scarf to the side–I prefer mine not to be centered, but it’s entirely up to you!
Dress up any outfit with your French Knot
The first method for wearing your scarf elegantly is very simple. Simply wrap your scarf around your neck, with each end flipped over the opposite shoulder. Only one end is flipped over the shoulder in some cases. The scarf should always appear to have been carelessly thrown over your shoulder as you dash out the door. Effortlessness is very fashionable!
Fold your scarf in half again, this time holding the loop end in your left hand and the two loose ends in your right. Simply slip your scarf over your head and loop the ends through the loop.
You can spruce up any outfit with it. And wearing a patterned foulard around your neck becomes a fashion statement in and of itself. It would look great with a beige trench coat in the spring or a wool blazer in the fall. When it starts to rain, tuck your silk scarf inside your jacket.


